Showing posts with label On the Menu. Show all posts

Tuesday, March 12, 2013

On The Menu: Roasted Chicken Cherry Nachos


Roasted Chicken Cherry Nachos (1-2 servings)
3-4 oz of Roasted Chicken*
1/4 cup of Dried Cherries
2 Tablespoons of Slivered Almonds
1/4 cup of fresh Spinach
12-15 Multigrain Tortilla Chips

Lay the tortilla chips around a small plate. Place warm roasted chicken over the chips; add Spinach; top with cherries and almonds.

*I purchased a whole chicken and roasted it one afternoon, having a meal for that evening and then saving the rest to use throughout the week. This has proven to be such a help through the week that I will more than likely be adding this to my weekly routine.


I've been trying to eat Dairy-free and Wheat-free since the beginning of February in hopes that I can figure out some things and get systems working correctly once more. Neither have been really hard to let go most days; some days I tear through the house throwing everything in sight just wanting to eat something without looking at the label or questioning the server about the ingredients.

I would say that a good 95% of my diet had some form of cheese or butter in it.

Um... I love, LOVE bread and butter. My little Grandma loves bread and butter. One of my little ladies could live on bread and butter. So, see I'm fighting my genes here!!

I've also been reading the book, "French Women Don't Get Fat" and before you stick your nose in the air at the French, it really has been a very eye-opening read for me. It's written by a woman who is French but lives in America. The book really just points to the fact that French women don't diet and they eat the things that they really want to eat. They do it in small portions; they skip the bread if they want the dessert, little choices like these allow them to eat pleasurably.

One of my favorite parts of the book was where she was speaking of how in the late eighteenth century a new code was fashioned in France, les arts de la table:
"The table became a spectacle. Standard dishes received their classical names, and there followed a rush of innovation, imitation, and, indeed fashion. Few Americans, even Michelin-guided gastrotourists, really appreciate the extent to which our cooking is like our couture."

I related to this very much as I feel that the cooking of and presentation of the meals I prepare are just another creative outlet for me. I'm looking forward to finishing this soon, but have already begun implementing a few ideas that I've taken away so far.

So, having new ideas and some new limitations, I've had the opportunity to introduce some new tastes to my palette and be creative pairing different ingredients together. These Nachos were definitely a huge hit for my taste buds! Please enjoy!

Friday, December 21, 2012

On The Menu: Sugar Cookies

Sugar Cookies

Heat oven to 375 degrees.

3 Cups Flour
1/2 Teaspoon of Salt
1/2 Teaspoon of Baking Powder
2 Sticks of Butter, softened but firm
1 Cup Sugar
1 Egg
2 Teaspoons Almond Extract

Whisk together dry ingredients in a separate bowl; cream together butter and sugar in a mixer on the low setting. Add egg and almond extract and mix until creamy. Add dry ingredients to the mix. 

Once dough forms, shape into a ball and refrigerate up to an hour. 

Once chilled, remove and cut out. Bake for 8-9 minutes (depending on your oven settings). 

I prefer chewy, cakey cookies so my cookies are pretty thick; for my perfect cookie, the key is to leave it in there just long enough to bake, but not quite to the point where it's beginning to brown.

Then I add icing (4 Cups Confectioner's Sugar, 3 Tablespoons Meringue Powder, 5 Tablespoons COLD water... some people prefer to use warm water, but I've personally always had it turn out better with cold.).

Then I almost pass out from the buttery, sugar goodness.

Have the loveliest of days!


Friday, November 9, 2012

Cleansing.

This has been what my diet has consisted of this week... in juice form. For the last several months, I've felt as though I needed to do something to get my systems working properly again. I had watched a documentary called, "Fat, Sick, and Nearly Dead" and was sold immediately on juicing. The main reason being that you were still getting all the good stuff from your vegetables and fruits, sans the fiber... which is the healing part to your digestive system.

It has been a good experience for me. I realized a few things about myself and my eating habits that will hopefully stick with me. My goal was to do a five-day cleanse, but I think I may extend it a few more days as I feel like there is still work being done. I began this on Monday, and Thursday afternoon was the first time I began to actually feel hungry. I have realized that consuming more water throughout the day definitely helps. We'll see how the weekend goes for me.

So, if you're out eating a delicious solid meal this weekend, eat an extra little bite for me!

OH! And big news over at My Yellow Umbrella today! There are some SUPER exciting things going on... like... A NEW SHOP!!! This is seriously very exciting as a lot of hard work has been put into this and the blessings of that hard work are already being recognized (which I'm just going to get a bit sentimental here and say that I am SO proud of Alina aka one of the Sisters in this new endeavor! She has worked so hard and I CANNOT wait to see where this leads!!!)

OH and more big news!!! My newest little baby niece will definitely be here very soon... VERY soon!!!! As in maybe tonight!!!! I cannot wait!!!!!!!!!!!!!! That's a lot of exclamation points, but there's a LOT of excitement going on here!!

Have the loveliest of weekends!


Tuesday, July 31, 2012

On The Menu: Zucchini "Spaghetti" and Marinara


That Zucchini up there was probably close to 18 inches long!
My brother and sister have a garden this year
(actually ALL my brothers and sisters have gardens this year... and I do not!)
and grew this gigantic one along with a few others.
So, several family members received some Summer goodness,
and they still had plenty for themselves.

This little guy hung out in the produce basket in our kitchen for a week or so,
because I wanted him to serve a great purpose and be used for deliciousness.
Then one evening,
we had different scraps of this and that but nothing to really be used together for a complete meal...
and then I looked over and saw him.
And we both knew the time had come.

I had just stopped by a local farmer's market for some tomatoes
so the creative juices,
as well as the tomato's,
began flowing.


Marinara:
Chop the tomatoes into small chunks and place into a quart pot. Add a couple minced cloves of garlic, basil, and salt and pepper to taste, and bring to a boil. After boiling for several minutes, bring to a simmer and let simmer until sauce thickens. This could take anywhere from thirty minutes to an hour depending on how saucy you are. Check and stir every so often until it is at the desired consistency.

Zucchini "Spaghetti":
Turn oven on to 350 degrees.
Use a cheese grater and begin grating the Zucchini*. Once grated, place in a bowl and add a little bit of olive oil, enough to cover the top or so, add some minced garlic, basil, salt and pepper to taste, and then mix together covering all the strands of Zucchini. Place in a roasting pan, and roast for 20-30 minutes, stirring once or twice in between. The strands will soften and the mixture will shrink considerably, and it will be perfect and taste wonderful. Once the strands are softened, remove from the oven and serve with the Marinara and Parmesan.

One of my other sisters recently made a meal similar to this (when my eyes looked over at that Zucchini, and my mind remembered how delicious her meal was, I immediately had to have it, so I used what was on hand to best re-create it!), however she just used sliced Zucchini. I chose to shred this to make my children (and my husband) think of it more like Spaghetti. It didn't work. I very much enjoyed it, though. It was a very light, fresh, Summery meal.

*TIP: When I do this again, I will peel most of the outer skin from the Zucchini. The pieces that were mostly the skin, became a bit too brittle and crunchy in the roasting process.

What are your favorite ways to use a giant Zucchini?


Friday, June 15, 2012

On The Menu: Capellini with Roasted Squash, Pine Nuts and Feta


It's a wonderful thing when a palette and a brain
work so incredibly well together
that when you take your first bite of their joint creation
you think and maybe even say out loud,
"ARE YOU KIDDING ME?!?!".

This one did it for me;
and I think it's in the pine nuts.

Capellini with Roasted Squash, Pine Nuts, and Feta:

One package of Capellini (or really ANY kind of string pasta)
One large Zucchini
One large Summer Squash
One Cup of Pine Nuts
Olive Oil
1/4 Teaspoon Rosemary
1/4 Teaspoon Basil
1/4 Teaspoon Garlic Powder
Feta

(When I made this, I halved this recipe and it fed four of us... and we each may have had seconds as well... I don't really remember... okay, yes I do, we did all have seconds AND THEN we each ate one of those delicious Cookie Dough Brownies. It was a good night.)

Heat your oven to 350 degrees. While waiting for the oven to pre-heat, begin slicing Zucchini and Summer Squash. I chose to slice into circles and then half and quarter them to have more in each bite. Once the oven is pre-heated, place your squash in a roasting pan and toss with Olive Oil, Rosemary, Basil and Garlic Powder; roast for approximately 30 minutes or until squash is soft and starting to get slightly browned.

Prepare Capellini according to the package directions. While waiting for the squash and Capellini, toast the Pine Nuts in a small skillet. The aromas that will begin permeating your kitchen will make you want to skip.

When you're finished skipping, remove the Pine Nuts from heat; remove the squash from the oven; drain the Capellini. Place the Capellini, Summer Squash, Zucchini, Pine Nuts and Feta in a bowl and toss together. 

And then... feast!


Friday, April 6, 2012

I love Punch.

Um, I really do.
At parties, at weddings, wherever punch is served,
I like it.

For my daughter's birthday, 
I tried a punch recipe off Pinterest.
It claimed to be the BEST punch ever...
I don't really like to loosely throw around the terms
'BEST' and 'ever',
so let's just say that it was good.
I thought I could find better.
In fact, 
I thought I could DO better.
It turned out good.
Really good.

I've now made this punchy little drink
three times, two different ways.
The first way I used:
Frozen Pina Colada mix
Fresh Strawberries
Crushed Ice
Ginger Ale

Mixed all the ingredients together (minus Ginger Ale)
in a blender, 
poured some into a glass, 
then poured Ginger Ale over it.
This one was good.
I wanted to try it without the ice, though.

The second time I made it I used:
Frozen Pina Colada Mix
Frozen Strawberries
Ginger Ale

Same thing.
This one, 
also good.
Really good.

The third time I made this...
I seriously only made it to take pictures of it. 
HAHAHAHA!
Okay, and because I really wanted some.
The second recipe wins my vote.
The fresh strawberries and ice
just don't give it the texture it needs
to be magnificent.
And if you're drinking punch,
you need it to be magnificent.

Pina Colada ~ Strawberry Punch
You'll need:
Frozen Pina Colada Mix
Frozen Strawberries
Ginger Ale

Mix the Pina Colada Mix and the strawberries together in a blender.
You may want to add a little bit of water to keep the strawberries
from sticking to one another.
Once mixed,
pour mixture into 5 or 6 glasses until 1/2 to 3/4 full;
then pour Ginger Ale over it slowly,
filling the glass.
Get your straw and give it a little stir,
and then sit back and enjoy!


I think you could also easily make this into an actual punch
in a punch bowl as well. That will be my next try!


**DON'T FORGET TO SIGN UP FOR THE PETIE MAE JEWELRY GIVEAWAY!**

Thursday, March 22, 2012

On The Menu: FAIL


I decided to try something new.
I've had Gnocchi at restaurants;
a friend of mine has made it for me;
I felt like this was something I could do quite easily.
Nope!
I paired it with some Sun-dried Tomato and Asiago Chicken Sausage...
also, not that good.
Okay, it was alright;
I don't want to give it a bad rep.

All in all, though,
this was a FAIL;
and the husband and I ended up eating 
a little more cereal 
than we usually do 
at our cereal bedtime snack. 

Anyone have any Gnocchi tips??

Monday, March 12, 2012

On The Menu: Maple Glazed Salmon

You'll need:
1 Salmon Filet
1/4 Cup Maple Syrup
2 Tablespoons Soy Sauce
2 Minced Garlic Cloves

Mix all ingredients (minus Salmon, of course) together.
Place Salmon in a shallow dish and pour mixture over; 
let marinate in the refrigerator for about 30 minutes.

Once marinated, I chose to grill this.
You could also bake it with the same results
(perhaps 400 degrees, 7-10 minutes).

This was a bit sweet for our taste, 
however it was good.
I think I'll try using a bit less syrup
and a tad more soy sauce next time around.

What are some of your go-to marinades??

Tuesday, February 28, 2012

On the Menu: The Train To Brussels

So, somehow I missed the train to Brussels...
Brussel Sprouts, I mean.

I did not eat Brussel Sprouts growing up,
and have never heard anyone say anything nice about them...
until recently.

First, my friend, Julie from my Book Club
LOVES them.
Like craves them love them.
So, one month she made them for us to try;
And I liked them,
I even noted my like for them here.

Then on my anniversary,
My Love and I got decked up real fancy and
went out to celebrate to a local seafood grill
(to which we had never been before)
and the server suggested that I try her fave,
flash-fried Brussel Sprouts.
Since I was in celebration mode,
I went for it!
And, whoa...
talk about 
I N C R E D I B L E.

And now I'm seeing them everywhere;
blogs, shows, 
I've even noticed them in the grocery store now
much more than I ever have before.
AND the health benefits of them...
good grief, they're quite amazing.

The other day I was craving those
little flash-fried sprouts.
And I wanted them.
So, I made them.

Oh, gracious, 
they were SO good
(I say they were SO good,
My Love says they were alright).
They tasted exactly the way I remembered them.
Ah! I just can't get over how GOOD they were.

So, here's what you do:

Strip a package of Brussel Sprouts of each of their little tiny leaves,
then (30 minutes later! Yeah, it seriously took me that long)
heat your skillet to a medium heat,
and cover with Olive Oil
then put ALL those little leaves in it.
Fry until the leaves are wilted and slightly crisp
and then sprinkle with just a tad bit of sea salt
(this is the restaurant's recipe,
I didn't have any sea salt at the time,
so I just used the salt I had)
and then serve.


We had ours with some Lemon-Dill Tilapia
and the whole meal was just...
SO GOOD.
I can't even think of another way to describe it.

Side note:
So, as good as this meal was...
two hours later and even later into the evening,
our house
STUNK.
So, Brussel Sprouts have been banned for now...
hahahahaha
at least cooked this way or if my husband is going to be anywhere near our home.

I'm anxious to try some other recipes;
please don't MAKE me rely on Pinterest,
what do you have for me??

Friday, February 24, 2012

On The Menu: P-Dub's Pots de Créme

That Pioneer Woman sure has a knack for all-around goodness!
Oooh, and guess what???
She's coming here!
And my sister snagged us some tickets to see her goodness in person!!!
And then I text my other sister and she got in on this madness!
And then I called my other sister and got her on this train, too!
Obviously, I'm a tad bit excited about this.

Aaaanyway,
she recently posted a recipe for 
but in it she also mentioned that it was an updated
version of a recipe she posted back in 2008.
So, I checked it out...
and then I made it.

OH 
MY
GOODNESS.

It is SO good.
SO UNBELIEVABLY GOOD.

And when you see the ingredients 
and how simple it is to make,
you'll run to your kitchen 
and make it immediately.
So, here's what you'll need:

Oh... and vanilla, oops.
Or whatever kind of flavoring or Liqueur you'd care for...
this is where the l'Orange came in on her updated version,
she used Grand Marnier.

Pour your bag of semi-sweet chips into the blender,
add four eggs, a pinch of salt, and a couple teaspoons of vanilla,
then pulse to blend.
Mix well and then...
take your HOT coffee (8-10 oz.)
and pour into your blender through the little top lid 
while continuing to blend.
Once blended and melded together well,
empty into some really cute or fun
pots, bowls, glasses,
whatever suits your fancy.
I have these really cute little tiny mason jars
that I used for this project {fail}
that worked smashingly.
They managed to come off cute,
yet filled to the brim with sassiness
(hmm, sounds a little like someone I know...).
See what I mean:

This recipe filled 11 of these small jars,
and I added some homemade whipped cream
and the amount was perfect
as this concoction is SO rich...
and wonderful.

Enjoy!

Tuesday, January 24, 2012

Baby Gourmet: Mashed Avocado and Banana


As you can see,
it's a hit!

Find a ripe avocado and a ripe banana and start mashing!

Avocados and bananas are great foods to start with 
when introducing solid foods to your baby.
Avocados are a great source of the "good" fats that 
babies need to aid in their brain development, 
and bananas have been known as the
"good mood food"
because of the serotonin and norepinephrine found in them.
Smart, happy baby?
Yes, please!

Friday, January 13, 2012

I Said I Like Things Fancy.

I don't make cheeseburgers very often.
I like cheeseburgers... sometimes.
It has to be really good.
Or I have to be pregnant,
because then I want cheeseburgers all the time.

My husband, however, loves them.
So, every so often I get a little twinkle in my eye,
and one magically appears for him.
HAHAHA!
Too bad this isn't true
(and also too bad that he had to witness me
almost burning the house down tonight
trying to make us perfection...
oh yeah, because I'm a perfectionist
just in case you hadn't caught that yet.).

He did get his cheeseburger.
Butter-toasted wheat bun;
hamburger;
Pepperjack AND American cheese;
barbecue sauce and mayonaise;
caramelized onions.

I, however...
fancied mine up a bit.
Butter-toasted wheat bun;
hamburger;
caramelized onions and mushrooms;
feta;
Balsamic Vinegar drizzled over.

And, yeah, it was everything I had hoped it would be.

This picture does not do it justice.
Just believe me, alright.

Also, Day One of crossing things off lists... was awesome.

Have a most lovely weekend!!


Wednesday, January 11, 2012

Gourmet... Baby Style.

My little man baby just started eating food.
Actually, he's tasted it...
he's not quite sure if he's ready to fully jump in that boat.

I was excited for this stage again
because it gives me yet another outlet
to get creative.
I made all of the little ladies food when 
they arrived at this stage
and plan on doing it for this little guy as well.
The health benefits, the savings,
everything is a plus in my book!

Here is documentation of the first bite ever.
It was on Christmas Eve at Grandpa's house.

"Uh, what is this in my mouth?"
So, for his first set of meals
he's been feasting on
Roasted Carrots and Baked Apples
and Whipped Sweet Potatoes
(doesn't that sound so much fancier than
carrots, apples, and sweet potatoes??
Yes, it does.
And we like to fancy things up
any opportunity we get.).

This took me maybe 45 minutes one afternoon.
I already had all the ingredients;
so this cost me...
let's see...
oh, nothing.
I always like the sound of paying nothing
and getting exactly what I want.

Basically, I just roasted some carrots;
baked some apples;
and baked a sweet potato.
Once these were fully softened,
I added the carrots and apples to a blender
and pureed them adding a little bit of water
until they came to a nice smooth blend.
I did the same with the sweet potato.
Once pureed,
I poured the mixtures into an ice cube tray
and set aside in the freezer until completely frozen.
Once frozen,
I popped them out of the tray and put them in a bag.


Viola!
(or Wha La... 
for those who don't fancy things up with French
every now and then.)

Okay, friends,
I've been working on some ways to implement some
MAJOR ORGANIZATION
around here.
Hopefully, I live through it and can tell you all about it!
Until then...


Wednesday, November 16, 2011

Loving this...

I have been waiting for the day that I step out my door and gaze upon this.
The jeweled colors of Autumn have arrived here.
And it kind of gives me a little extra skip in my step.

I actually have a lot on my mind right now...
which is NEVER good for me to combine with blogging.
So, I'm keeping this short...
but delicious!

This last weekend provided the opportunity for a great photo session; 
the images are still in editing,
but should be up soon.

I also had the opportunity to throw an 
open house of sorts 
for one of my brother-in-law's and his fiance
who will soon be united in wedded bliss 
forever and ever.
I can't wait.
And it was a great time to see some family friends
who we just don't see as often these days.
So, here's the delicious part of this post:


The recipes for the spread of food were provided 
from none other than,
yep, Pinterest.
(By the way, my Pinterest is whacked right now!
Anyone else experiencing this??
And now of course since I just typed this,
I checked it out and it's working fine.
Ah! Pinterest!!!)

This crumb cake is so good. SO GOOD.
As I was checking this recipe out,
I stumbled upon the Pumpkin Pie Snickerdoodles.
Needless to say, 
I'm now following a new blog...
because I want to eat everything I saw.
However, the Peanut Butter Chocolate Bars were...
um, OUT OF THIS WORLD AMAZING.
And so easy to make...
seriously, melt some stuff and set it aside.
All in all our bellies were full of some 
pretty tasty treats.

Also, I just feel like mentioning that
I am SO incredibly grateful for the mate
my little punk bro-in-law has found himself.
All my brothers have provided me with 
incredible sisters...
and I'm not just writing that because 
I know they all read this.
I mean it should definitely earn me some points,
but I DO genuinely mean it when I say
that I have been extremely blessed by each of them.
(In fact, I somehow managed to wrangle one 
of them into helping me 
paint my living room this week!
I've only had the paint since February!!
hehehe AND I might even get a Spangles Pepsi
out of it because she's now hooked as well!
Pictures to come!)
Anyway, to learn more about the newest sis
go look at her blog...
unless you don't like things that are awesome,
because it's basically awesome at it's greatest.

So much for keeping it short!


Tuesday, November 8, 2011

Roasted Carrot and Caramelized Onion Soup


Last week sometime, I had noticed that one of the blog's I follow had a recipe for some kind of carrot soup. 
I never had the chance to actually look at the recipe and didn't really mind that I hadn't... 
until last night when, 
out of the blue, 
I wanted to make carrot soup for dinner.
So, I thought to myself,
"Carrot soup can't be that hard to make,
give it a go, Nicole!"
(and the other voices in my head were chanting,
"Do it, do it, do it!".
Too much info about my psychotic tendencies??)

What I came up with wasn't too bad.
In fact, my taste-tester aka the-one-I-love-most-all,
gave it an "Alright" and a 4 or 5 on a scale of 10.
That's actually MUCH better than what I expected from him.
(When he walked into the kitchen and saw what was being prepared,
he asked what was being made, 
we had some "flirtatious" banter, 
and he then said,
"Oh, that's just not what I would have picked off the menu.")

If you LIKE carrots, you might enjoy this.
If you have an insane love of root vegetables pureed into soup,
then you're going to love this.

Roasted Carrot and Caramelized Onion Soup

Two Cups of Carrots (I just used a bag of baby carrots)
Half of an Onion
Two Cups of Chicken Stock/Broth
One Tablespoon of Honey
1/2 Teaspoon of Ginger

I first tossed the carrots around with some olive oil, honey, and ginger and roasted them for about an hour at 350 degrees. I also sliced the onion and began caramelizing it in a skillet. Once the carrots were soft, and the onions were beautifully browned, I added them plus the other ingredients to the blender, excluding the stock. I pureed the mixture, adding the stock as needed, until it reached the consistency I preferred (I did end up using the entire two cups and even added a little bit of water as well). I moved the soup to a pot and let it simmer for about 20 - 30 minutes. 

I served this with a little dollop of sour cream and some freshly baked bread drizzled with honey and I actually really liked this soup. 
It may not become a menu staple, 
but it will definitely be "pinned" in my mind 
(oh, yeah, I think in Pinterest terms now). 
I also think some Thyme would be a really good fit somehow 
(because one time, my sweet friend, Sarah, made some Carrots with Thyme for book club and they were so marvelous!). 
So, give it a go sometime and see what you think!


Tuesday, October 11, 2011

And I'm back!

So, remember when I mentioned about the 
Whirlwind of Perfection weekend 
being a bit too much??
Yep, it was.
That, plus having to visit the germ-ridden office of our Family Physician,
not just once, but TWICE in one week...
for the SAME THING
(which wasn't even a sickness!!)...
hit my immunity system like a tornadic terror
(just thought I'd stick with the storm terminology here).

I was so sick.
I mean... SO SICK.
As in, my husband had to stay home two days from
work just so there was a functioning adult
maintaining the chaos that dwells here.
It was a terrible virus...
I'll spare the details.
After a couple days, the medicine finally kicked in enough
to allow me to function, but still feel sick.
So, I had to take things into my own hands.

Say hello to my little friend.
Our blender died a few months back, 
and I wasn't too quick to get a new one... 
until this last weekend when I wanted this.
This little smoothie is PACKED with immunity boosting nutrition.
The little ladies and I drank one almost everyday last winter,
(1) because it's good,
(2) because it is seriously SO GOOD for your immune system.

I pour a little bit of orange juice and milk in my blender;
throw in several handfuls of spinach;
 add a pear;
throw in a few red grapes;
and I blend away.

And here are the benefits:
Not From Concentrate Orange Juice - Vitamin C;
Milk - Calcium and Vitamin D 
(plus I'm not a big milk drinker, so I sneak it in whenever possible);
Spinach - SUPER FOOD!! Spinach has so many health benefits,
however, I use it in this for the iodine, which helps strengthen the immune system;
Pears - another SUPER FOOD! Pears are also so beneficial to your health, 
again though, I use them in this for the immunity booster;
Red Grapes - help fight viruses and some bacteria.

And you can't even taste the spinach.

I've had one two days in a row now and I feel like a new person... 
or at least my old self
(which is why I'm up blogging, instead of nestled in my bed!).

So, back to life.
I finally finished editing last weekend's photo sessions.
Here are some of my faves:


Goodness, that face!


Such a funny family... seriously.
Working with kids always makes me move a little more quickly,
however, sometimes no matter how quickly I move,
they're just not havin' it!
And that lends for great shots like this:

Ha! I love it.

And just for kicks, here's a little peek at this week's project:


A few sweets for my Sweets!
These will soon be adorning the heads of my little munchkin ladies.
They asked for some new headbands and bows...
so I cannot disappoint,
nor can I pass up the opportunity to CREATE!

Holla!
(I don't even know where that came from, so this seems like a good time to just stop.)


Tuesday, September 27, 2011

A lot of this and a lot of that...

Baked... check.

Painted... check.

Ate soup in bread bowls... check.

 Pumpkin Patch... check.

The cool weather made me so giddy this last weekend that I accomplished my entire 
Autumn To-Do List in two days!
Just kidding.
I DID bake and go to the Pumpkin Patch.
The painting and the bread bowl soup were done last week sometime... worth sharing though.

First...the recipes: 

Sweet Potato-Apple Crisp

2 Large Sweet Potatoes
2 Large Apples
Olive Oil
1 Teaspoon of Cinnamon
1/4 Teaspoon Cloves

Topping:
1/2 Cup of Flour
1/2 Cup of Oats
1/2 Cup of Brown Sugar
1 Teaspoon of Baking Powder
1 Teaspoon of Baking Soda
Candied Walnuts*

Preheat oven to 350.
Slice potatoes and apples into small chunks and place in a roasting pan. Drizzle with olive oil and add cloves and cinnamon; mix together. Roast until potatoes are soft and the sugars in the apples begin to caramelize, about an hour or so. Prepare topping; mix all ingredients except candied walnuts. Once potatoes and apples are nicely roasted, remove from oven and place into a 9x9 (9x13 would probably work just as well). Pour topping over potatoes and apples. Place dish in oven and bake for about 20 minutes, or until topping gets crunchy. Remove from oven and sprinkle candied walnuts over entire dish.

*You can make your own candied walnuts by toasting about a cup and a half of walnuts in the oven (350 degrees) on a baking sheet; while these are toasting, pour 1/2 a cup of sugar in a saucepan and cook on medium heat, stirring constantly, until the sugar caramelizes and becomes liquid.  Remove toasted walnuts and pour into saucepan; stir to completely coat walnuts. Once coated, place walnuts back on baking sheet to cool. Sprinkle a little coarse salt on them for a nice little surprise when you bite into them.  Or don't.

We ate this as a side dish, but you could eat this as a dessert with a little vanilla ice cream... ooh, yum. Although if you have a sweet tooth, you may want to add a bit more sugar to the recipe as it's not a super sweet dish, as desserts should be.

Loaded Potato Soup

2/3 Cup of Butter
2/3 Cup of Flour
7 Cups of Milk
4 Cups of Potatoes
4 Green Onions
10-12 Strips of Bacon
1 Cup of Sour Cream
Salt and Pepper to taste
Bread Bowls*

Melt butter; stir in flour until smooth.  Gradually stir in milk until it thickened. Add potatoes and green onions. Stir constantly until soup bubbles. Reduce heat and simmer for 20 to 30 minutes, or until potatoes are soft. Mix in remaining ingredients and serve in bread bowls.
This recipe will feed 4 to 6 people. Sometimes I half the recipe and sometimes I just freeze the leftovers.

*I used the same dough recipe that I used here but shaped into four large balls instead of rolls. Once baked you just scoop out the middle and pour the soup in.


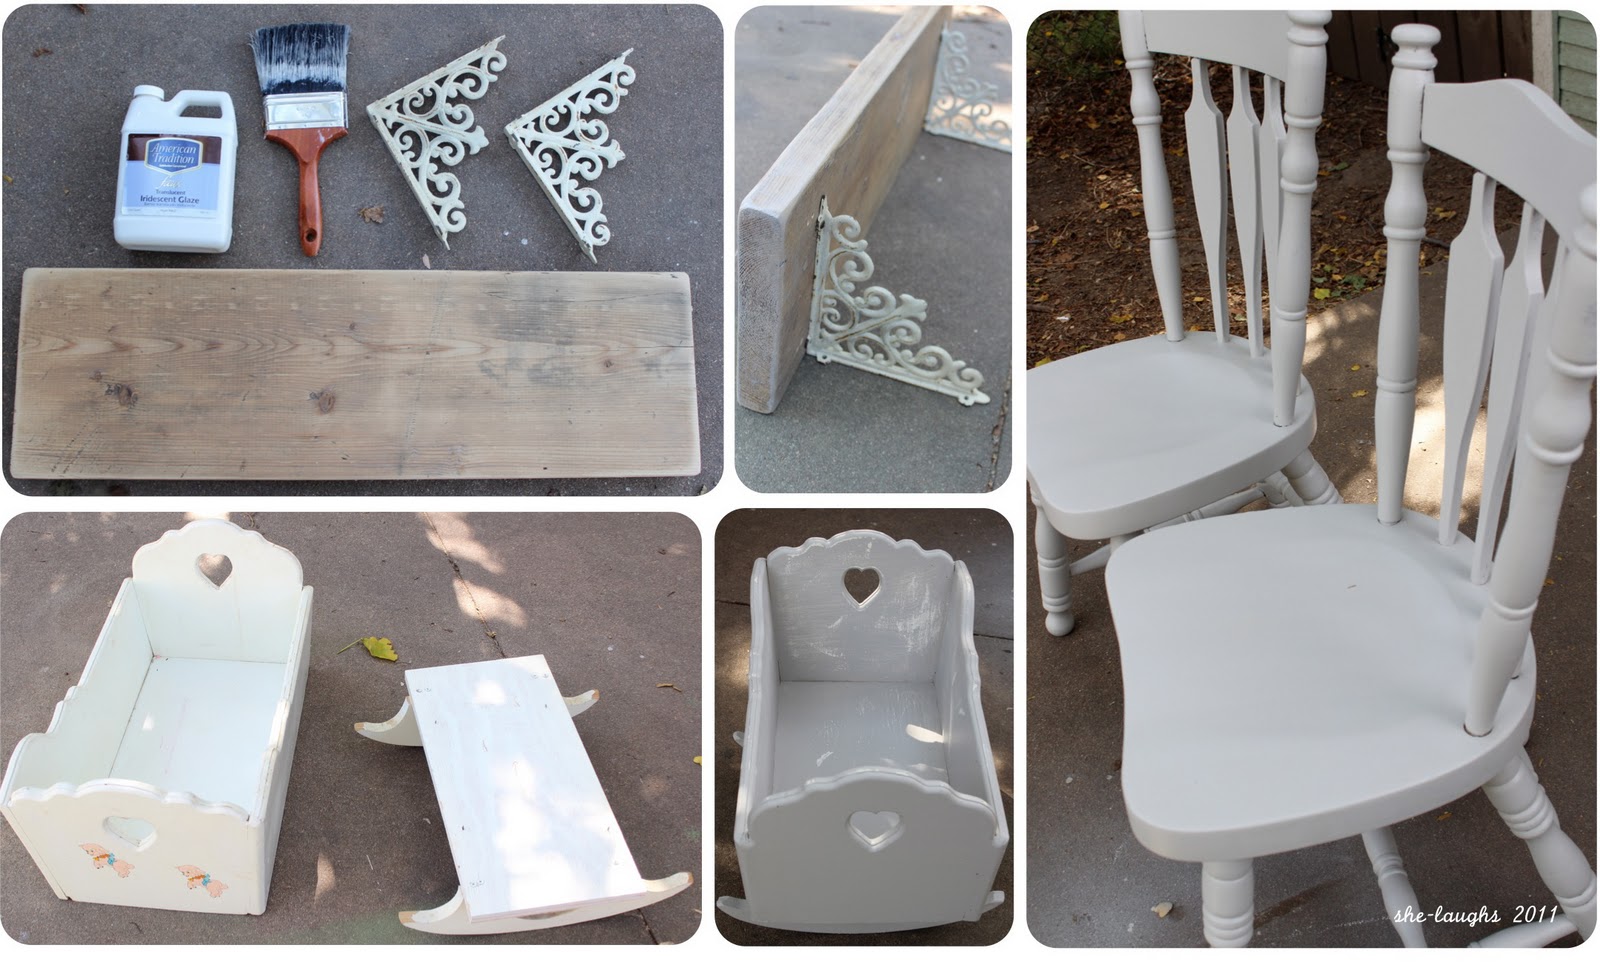
Second... the painting:
I'm sloooooowly redecorating my room 
(as in I have pieces that I want to put in there all over the floor and dressers, but haven't put them up!)
and wanted a shelf.
So, I made one from some wood 
(from MY stash of wood in the garage, Husband!)
 and some old iron brackets that I've used several different ways throughout the years. 
I am loving that translucent glaze on EVERYTHING, so it received a coat of that, too.
And I love it.

I found that baby cradle at my Dad's house... 
and just took it.
(Other people go to their parent's houses and just take what they want, right? Oh... just us? Hmm...)
It had pink sheep just kind of frolicking around on it... not really my style.
Hey, frolicking sheep are great, if that's your thing... it's just not mine.
So, it received a little TLC, a coat of gray paint, and a little sanding to beat it up a bit because it's going to get beat up anyway... believe me.  
My daughters are kind of baby crazy... they MIGHT get it from me.

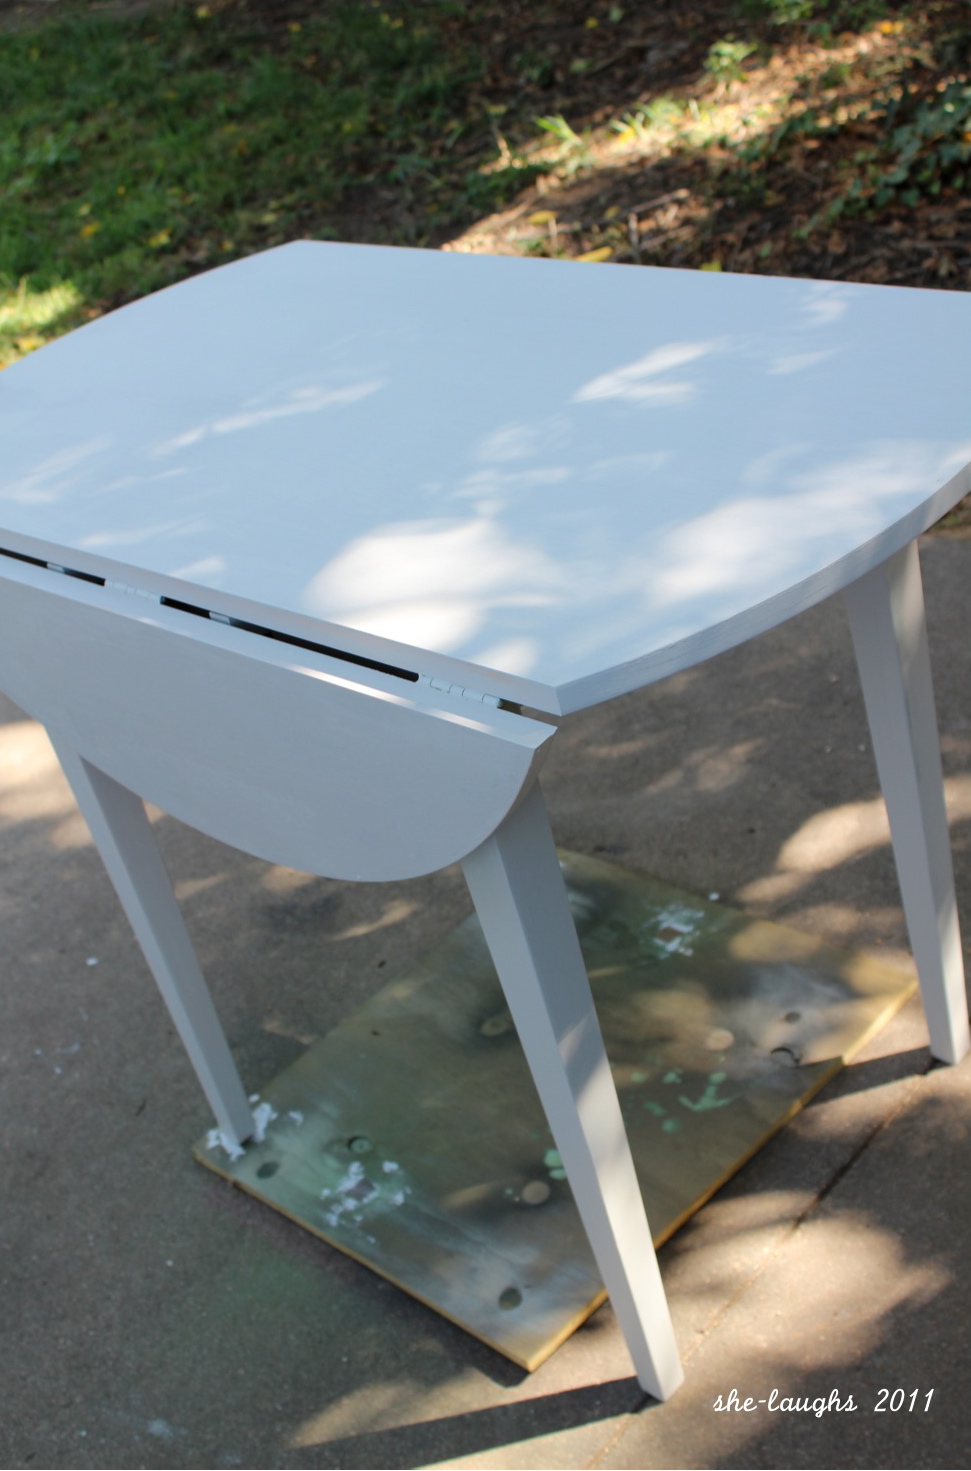
We inherited those chairs (plus two more matching ones) from my in-laws when we were first married.  They're stained in a dark wood and, again, just not really my style.
And they needed to match this table:

(more on this to come)

And now they do.

And finally... 
(Yes, this post WILL have to end sometime... just keep telling yourself that!)
The Pumpkin Patch:
Like the Fair, 
I love everything about the Pumpkin Patch.
And we were the very FIRST ones there this year;
which means we did the zip-line first, slid down the slide first, jumped on the bouncing pillow first, ran through the corn maze first, rode the little train first, and had first pick of the crop
(Whoa...please remember I'm a first-born-only-girl-in-my-family brat as you read that last sentence).
It was awesome.
Aaaaaaand... we had lunch at Arby's afterwards 
(that one's for you, Becky!).
Perfection.

Wednesday, September 21, 2011

Tomato Soup

When I was dating my husband, I had lunch with his family every Sunday.
(His family included a dad, a mom, and FOUR brothers, yeah that's right, FIVE BOYS total...more on that some other time!)
And one Sunday, his sweet mother made tomato soup.
I had never had tomato soup.
I didn't grow up eating it.
The only soup I remember eating from a can was Campbell's Chicken Noodle, and that's just because that's what you eat when you're sick.
I think maybe one of his brothers had asked me if I liked tomato soup and I answered that I really didn't know because I hadn't ever had it and they were shocked.
And when I took my first bite, all eyes were on me, waiting in anticipation for my reaction.
I gulped it down. I really did not like it.
And when that same charming brother asked me how I liked it, I believe I replied,
"It tastes like tomatoes.".

Fast forward a few years, I'm married and thinking that maybe I would like tomato soup if I made it myself (I'm kind of snobby like that).
And I did.
And I still do.
So, here it is:


Tomato Soup For Snobs:

Three to Four Tomatoes Diced OR Two Cans of Diced Tomatoes
One Medium Clove of Garlic
1 Teaspoon of Basil
1 Cup of Chicken Stock or Broth*
1/2 Cup of Milk or Cream (whatever you have on hand, both are good)
Salt and Pepper to taste

In a pot, combine tomatoes, garlic, basil, and chicken stock; bring to a boil.  Let boil until tomatoes are soft then remove from heat.  Pour mixture into a blender and blend until smooth.  Pour mixture back into pot and add milk.  Let simmer for 15 to 20 minutes.

Grill yourself a Grilled Cheese Sandwich.

I like to add a little dollop of sour cream and a little more basil on top. It looks pretty, it's delicious, and it makes me feel a little fancy. 

Eat it and raise a fist in honor of tomato soup snobs everywhere.

*Stock is made with bones; Broth is made without bones.  I use both, but I think I may prefer Stock.

Wednesday, August 31, 2011

My Last Meal

If I am ever in a situation where I am being offered one last meal, these will make the list.

I went through a little phase where I was making Cinnamon Rolls... a lot.
I have a pretty easy dough recipe and Cinnamon Rolls are good, so it just naturally happened.
Then one day I was making Spinach Artichoke Dip and thought to myself,
"Hmm... I wonder if putting this cheesy dip in dough would be be good?".
What a silly question... OF COURSE it would be.
And so, Spinach Artichoke Rolls became my new obsession.
Make them today
 (or come to my house and have one of the leftover's from book club last night... actually there will be none left by the time you get here so scratch that idea).


First, the dough:

Buttermilk Rolls 
(This recipe was given to me a few years ago from a lady who was willing to invest a little bit of time in some of us young moms and teach us the ways of old... okay, really just how to make awesome bread.) 

3 3/4 Teaspoons of Yeast
1/2 Cup of Warm Water
4 Tablespoons of Sugar
5 1/3 Tablespoons of Melted Butter
1 1/2 Cups of Buttermilk*
1 Tablespoon of Salt
1/2 Tablespoon of Baking Soda
4 1/2 Cups of Flour

*If you don't have Buttermilk, you can substitute it with regular Milk and 1 Tablespoon of Lemon Juice.

Set oven to 400 degrees.

I have a Bosch Universal Plus so making dough is a pretty easy task... put the dough hook in and add all the ingredients.  Any mixer should work; if you don't have a mixer, I think this dough would still be pretty simple to make (and pretty forgiving) and a great arm workout.

Once all the ingredients are mixed together, knead for 3-4 minutes (medium speed on a mixer).  Then take the dough out, shape into a ball, and let stand for 15 minutes.

(If wanting to use for rolls, the next step is to roll into balls and bake for 15-20 minutes. Easy!)

While your dough is standing, start preparing the Spinach Artichoke Dip/Spread.

Spinach Artichoke Dip/Spread

2-3 Tablespoons of Olive Oil
2 Large Cloves of Garlic, Minced
8 Ounces of Fresh Spinach
1/2 Cup of Milk
8 Ounces of Cream Cheese
8 Ounces of Quartered Artichoke Hearts
2.5 Ounces of Shaved Parmesan
A Small Block of Mozzarella 
A Couple Dashes of Worcestershire Sauce
A Little Dash of Ground Pepper

Saute´ the Garlic in the Olive Oil for a few minutes, add Spinach and saute´for a few more minutes. Add Milk, Cream Cheese, Parmesan and let melt, continuing to stir. Once completely melted add Worcestershire Sauce, Ground Pepper, and Artichoke Hearts, let simmer and try not to sneak any.


Back to the dough... roll into a huge, pretty thin square. Spread the Spinach Artichoke Dip, completely covering the dough. Take the edge and begin rolling, just as you would if making Cinnamon Rolls. Roll into a log and slice into as many pieces as you'd like.  I bake these in a 9x9 pan, so I usually slice them into nine rolls (however, they are HUGE and could easily be sliced into, oh... probably 18! So, it just kind of depends of your mood, and who all will be eating them.). Place the rolls into the baking pan and bake for 15 minutes. At 15 minutes, switch the oven setting to Broil and grate as much or as little Mozzarella as you'd like over the tops... I like a lot. Broil for about five more minutes or until Mozzarella is getting a nice toasty brown.


Serve these hot; you'll find that there actually won't even be an option to serve them any other way because they will be out of the pan and into your belly in seconds! So, enjoy those seconds... and then have another one.